
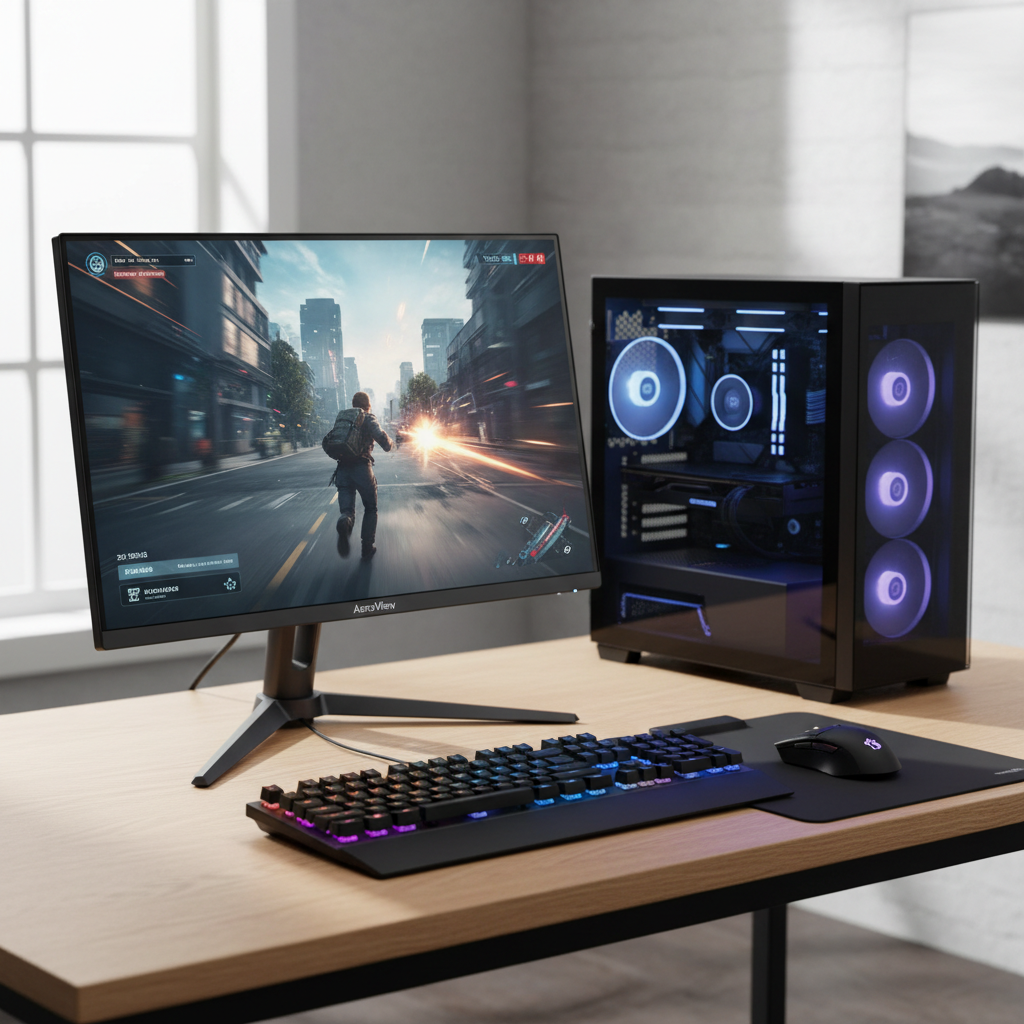
Best budget gaming monitor 1080p 144hz shopping is mostly about avoiding the “looks great on paper” trap: you want low motion blur, stable refresh behavior, and the right sync support, without paying for specs that won’t matter at 1080p.
At this price tier, a monitor can still feel fast and clean in shooters, but only if the panel type, overdrive tuning, and VRR range cooperate. Otherwise you end up with ghosting, flicker, or a 144Hz label that doesn’t translate into a smoother game.
This guide focuses on what actually changes your day-to-day experience: response performance you can feel, input lag you don’t notice, and compatibility that saves you from troubleshooting. I’ll also include a quick comparison table and a practical checklist so you can buy confidently.
Quick verdict: what “best” means on a budget
If you want one simple rule, it’s this: prioritize motion handling + VRR first, then color/contrast, then extras like speakers or fancy RGB. A “cheap” 144Hz display that smears motion can feel worse than a decent 120–144Hz panel tuned well.
- For competitive FPS: look for a fast IPS (or a well-tuned TN if you don’t care about color), solid overdrive options, and VRR that works cleanly.
- For mixed gaming + school/work: IPS usually wins because text clarity and viewing angles matter more than chasing the last millisecond.
- For dark, story-heavy games: VA contrast can look great, but many budget VA panels have more smearing in dark transitions.
Key point: the best budget gaming monitor 1080p 144hz is usually a 24-inch IPS with FreeSync (often “G-SYNC Compatible” in practice), and a stand that at least tilts properly.
Comparison table: what to look for (and what to ignore)
Here’s a quick way to compare options without getting lost in marketing terms. Use it to narrow your shortlist before you read reviews.
| Spec / Feature | Good Budget Target | Why it matters | Common gotcha |
|---|---|---|---|
| Size / resolution | 24" at 1080p | Sharp enough, easy for GPUs to drive at 144Hz | 27" 1080p can look soft for text |
| Refresh rate | 144Hz (or 165Hz) | Smoother motion, lower perceived latency | Needs correct cable + settings to actually run at 144Hz |
| Panel type | IPS (most people) | Balanced color + speed | Budget IPS contrast is often “just okay” |
| VRR | FreeSync / Adaptive-Sync | Reduces tearing and stutter when FPS fluctuates | Some models flicker at low FPS or in menus |
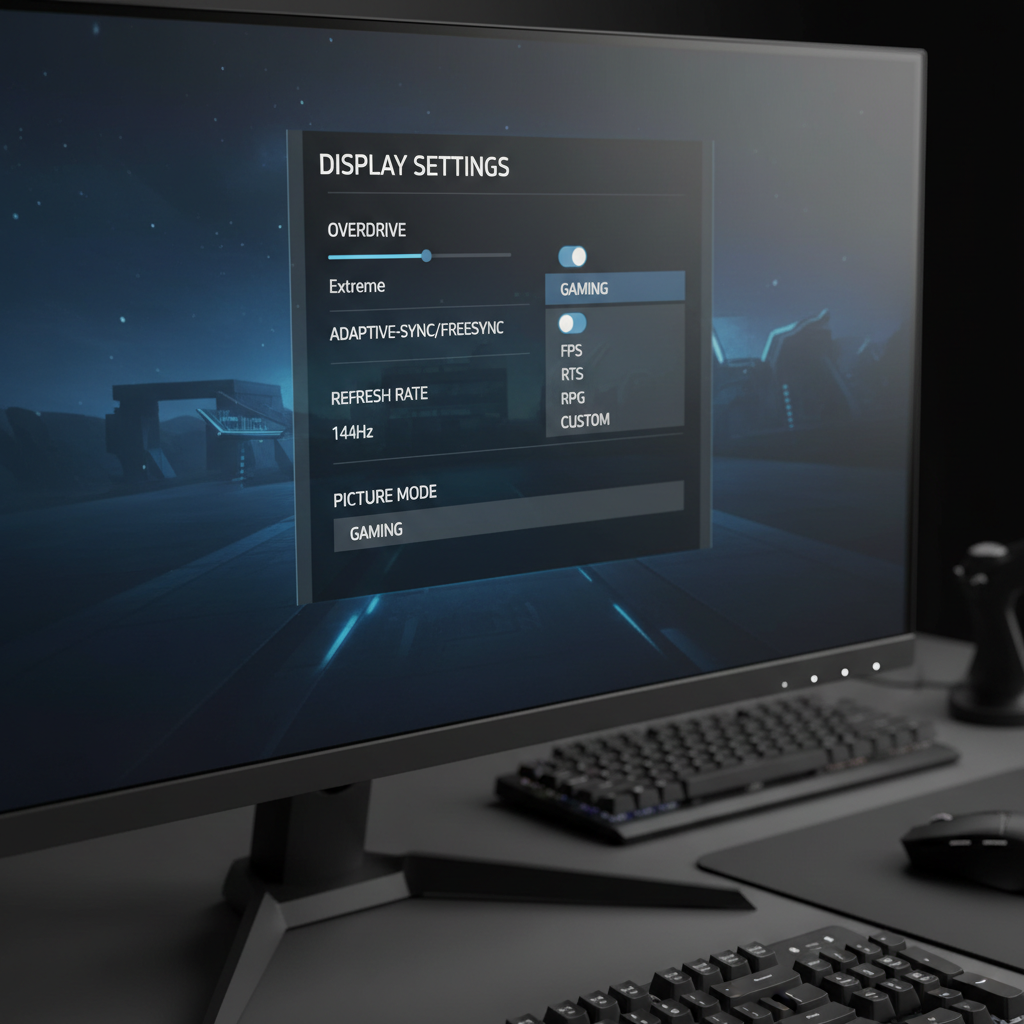
| Response/overdrive | Multiple overdrive levels | Lets you tune ghosting vs overshoot | One “fast” mode can add bright inverse ghosting |
| Ports | DisplayPort + HDMI | Flexibility for PC/console | Some HDMI ports cap at 120Hz or 144Hz depending on model |
Why budget 1080p 144Hz monitors vary so much
Two monitors can share the same headline specs and still feel completely different in-game. That difference usually comes from tuning and quality control, not the spec sheet.
- Overdrive tuning: Some brands ship aggressive “1ms” settings that create overshoot, those bright trails that look worse than normal blur.
- VRR implementation: Adaptive-Sync ranges and behavior under low FPS can vary; flicker and pulsing brightness are common complaints on certain panels.
- Panel lottery: Budget lines sometimes have more variation in backlight uniformity, dead pixels, or IPS glow, and return policies matter.
- Factory settings: Many monitors arrive too bright and too blue, so they look “punchy” in a store listing but harsh at home.
According to NVIDIA, variable refresh rate displays can reduce tearing and stutter by matching the display’s refresh to the GPU frame output, which is why VRR is often the biggest “feel” upgrade after moving off 60Hz.
Fast self-check: pick the right type in 2 minutes
Before you compare brands, get clear about your constraints. This prevents buying a “deal” that doesn’t fit your setup.
1) Your GPU and typical FPS
- If you usually sit 100–160 FPS in esports titles, 144Hz makes sense and will feel smoother.
- If you hover 60–100 FPS in heavier games, VRR matters more than pushing max refresh all the time.
2) Your desk distance and text sensitivity
- 24" 1080p is the safe pick for sharp UI and reading.
- 27" 1080p can be fine for couch distance, but many people notice softer text up close.
3) Console, PC, or both
- If you use PS5/Xbox too, double-check supported 120Hz over HDMI and whether the monitor accepts 1080p120 cleanly.
- For PC, having DisplayPort keeps things simpler for 144Hz + VRR.
Buying checklist: what to verify before you hit “Add to cart”
Use this as your “no regrets” list. It’s short on purpose.
- Adaptive-Sync support (FreeSync / VESA Adaptive-Sync) and a reasonable VRR range.
- Realistic response performance: look for reviews that discuss ghosting/overshoot, not just the “1ms” claim.
- Overdrive settings that behave well at 144Hz and also at lower refresh rates with VRR.
- Stand adjustability: tilt is minimum, height adjustment is a quality-of-life upgrade if budget allows.
- Return policy: budget panels can have uniformity quirks; painless returns reduce stress.
Quick tip: if a listing screams “1ms” but barely mentions Adaptive-Sync, treat it cautiously. For the best budget gaming monitor 1080p 144hz experience, smooth frame pacing often beats a marketing response number.
Setup steps that make a budget monitor feel faster
You can buy the right panel and still get a bad first impression if Windows, GPU settings, or overdrive are off. These steps fix most “why doesn’t 144Hz feel smooth?” complaints.
Step-by-step (PC)
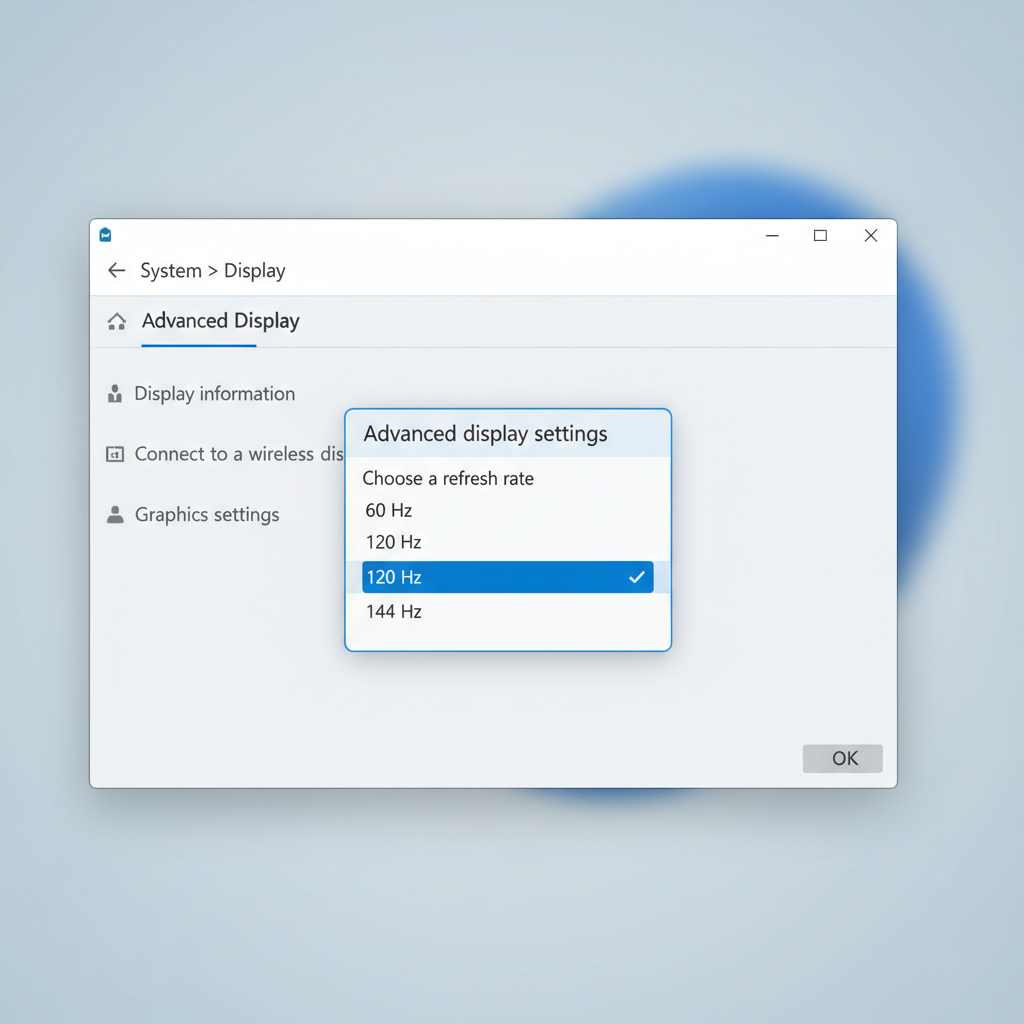
- Set refresh rate to 144Hz in Windows display settings and confirm in your GPU control panel.
- Use DisplayPort when possible, and avoid questionable off-brand cables if you see flicker or dropouts.
- Enable VRR (FreeSync/Adaptive-Sync) on the monitor, then enable it in AMD Adrenalin or NVIDIA Control Panel.
- Tune overdrive: start at “Normal” or “Fast” (not the most extreme), then check for inverse ghosting in motion tests or in your usual game.
- Cap FPS slightly below max refresh (example: 141 for 144Hz) if you’re using VRR, which can reduce latency spikes and tearing at the ceiling.
Step-by-step (console)
- Set console output to 120Hz mode where supported, and confirm the monitor’s info panel shows 120Hz.
- If the image looks washed out, check RGB range (Limited vs Full) on the console and monitor.
- Keep sharpening “enhancers” low; they often add halos to UI and reduce clarity.
Common mistakes (and what to do instead)
- Buying 27" 1080p for desk use because it’s “more screen” then hating the text softness. If you sit close, 24" usually fits better.
- Running 144Hz over the wrong port/cable. If your monitor supports 144Hz only via DisplayPort (varies by model), HDMI might silently cap you.
- Maxing overdrive and assuming faster is always better. If you see bright trails, back it off one step.
- Ignoring ergonomics. A cheap stand that forces bad posture can become the real “cost.” A simple VESA arm can help if the monitor supports it.
According to VESA, Adaptive-Sync is part of its display standards ecosystem, and in practical terms that means you’ll often see similar VRR language across brands, even though the real-world tuning still differs by model.
Conclusion: the smart way to choose right now
If your goal is smooth, responsive play without overspending, aim for a 24-inch 1080p IPS with reliable Adaptive-Sync, workable overdrive settings, and the right ports for your devices. That combo tends to deliver the “why didn’t I do this sooner?” upgrade from 60Hz without creating new problems.
Two action steps that keep you out of trouble: shortlist 2–3 models, then read one or two reputable reviews focused on motion performance and VRR behavior; after it arrives, spend ten minutes on refresh rate, VRR, and overdrive tuning before judging it.
FAQ
What size is best for a budget 1080p 144Hz gaming monitor?
For most desks, 24 inches is the comfortable match for 1080p because text and UI stay crisp. If you sit farther back, 27 inches can work, but many people notice softer edges up close.
Is IPS or VA better for the best budget gaming monitor 1080p 144hz?
IPS is usually the safer all-around pick because it balances motion clarity, color, and viewing angles. VA can look punchier in dark scenes, but budget VA models often show more dark-level smearing, which some players find distracting.
Do I need FreeSync or G-SYNC for 144Hz?
You can run 144Hz without VRR, but VRR helps when your FPS isn’t perfectly steady. Many FreeSync/Adaptive-Sync monitors also work as “G-SYNC Compatible” over DisplayPort, though results can vary by model and firmware.
Why does my monitor say 144Hz but I only see 60Hz in Windows?
This is commonly a settings or connection issue. Check Windows advanced display settings, confirm you’re using the correct input (often DisplayPort), and verify your cable and GPU driver settings.
Is 165Hz worth paying extra over 144Hz at 1080p?
The jump exists but it’s smaller than 60 to 144. If the 165Hz model also has better overdrive tuning, VRR behavior, or ergonomics, it can be worth it; if it’s just a number bump, you might not feel much change.
How do I reduce ghosting on a budget gaming monitor?
Try a lower overdrive setting and test in your actual game, not just a menu. If ghosting is worst in dark scenes, that can be panel-related (often VA behavior), and swapping models may be the realistic fix.
Should I enable motion blur reduction (MBR/ELMB) on a 144Hz monitor?
It can improve perceived clarity in fast motion, but it often reduces brightness and may not work with VRR at the same time. If you’re sensitive to flicker or eye strain, you might prefer VRR alone and a well-tuned overdrive mode.
If you’re trying to pick the best budget gaming monitor 1080p 144hz without spending nights comparing spec sheets, focus on a short list that nails VRR, motion tuning, and the ports you actually use, then buy from a retailer with easy returns so you can judge the panel in your own setup.