
how to build a gaming pc under 800 usually comes down to one thing: spending where it shows up in real FPS, and refusing to overspend on parts that only look impressive on a spec sheet.
If you have an $800 ceiling, you can absolutely build a PC that feels “real” for 1080p gaming, handles esports titles smoothly, and runs many AAA games with smart settings. The catch is that this budget punishes mismatched parts, like pairing a strong GPU with a weak power supply, or buying a fancy case and then cutting corners on the SSD.
One more thing before parts lists: prices move weekly, and “under $800” might mean different tax/shipping totals depending on where you live. So think in ranges, not single perfect picks. I’ll show you a budget split, a couple of solid part directions, and the practical steps that keep first builds from turning into a weekend-long troubleshooting session.
What $800 realistically buys you (and what it doesn’t)
At this price, you’re building a strong 1080p machine, with some room for 1440p depending on the game and your expectations. You’re typically aiming for high settings in competitive games, and medium-to-high in many newer single-player titles.
What it usually does not buy: maximum ray tracing settings, top-tier creator workloads, or a “buy once, never upgrade” setup. But you can build something balanced, quiet enough, and easy to upgrade later if you choose the right platform and power supply.
- Best value target: 1080p high refresh (especially esports)
- Secondary target: 1440p with optimized settings in many games
- Upgrade-friendly goal: enough PSU headroom and a modern CPU socket
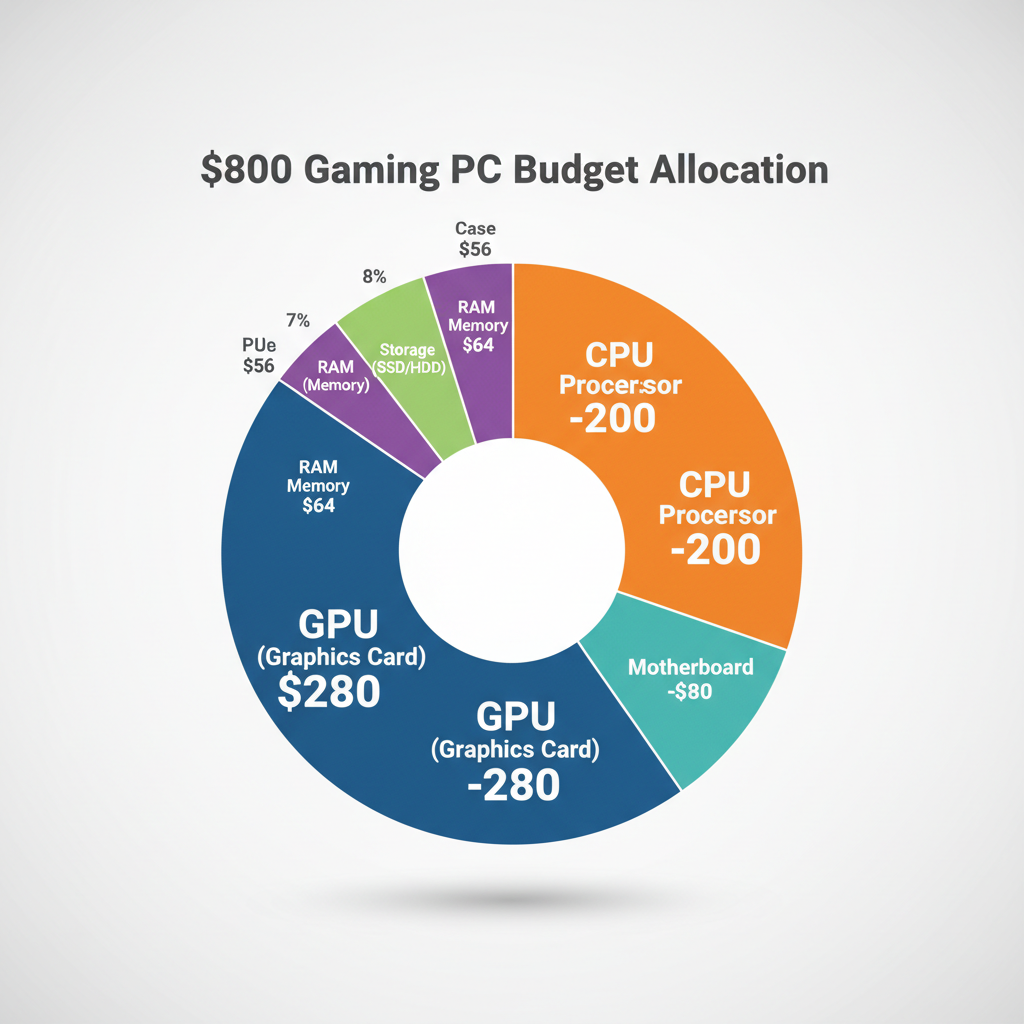
Budget breakdown: where your money should go
When people miss the mark on how to build a gaming pc under 800, it’s often because the budget gets “leaked” into looks, overspec cooling, or brand premiums. A clean split keeps you honest.
| Part | Typical Budget Range | Why it matters |
|---|---|---|
| GPU | $300–$380 | Largest FPS impact for gaming |
| CPU | $120–$180 | Stability, 1% lows, esports performance |
| Motherboard | $80–$120 | Features, upgrade path, reliability |
| RAM | $40–$70 | 16GB is the practical baseline |
| Storage | $50–$90 | 1TB NVMe keeps installs manageable |
| PSU | $55–$90 | Stability, safety margin, future GPU |
| Case + fans | $50–$90 | Airflow and build comfort |
According to Consumer Reports..., shoppers should account for total cost (including add-ons and fees) when comparing purchases; for PC building, that translates well to remembering tax, shipping, and “small stuff” like thermal paste or a fan splitter.
If you only remember one rule, make it this: don’t “finance” your GPU by buying a questionable power supply. It’s the kind of savings that sometimes comes back as instability at the worst time.
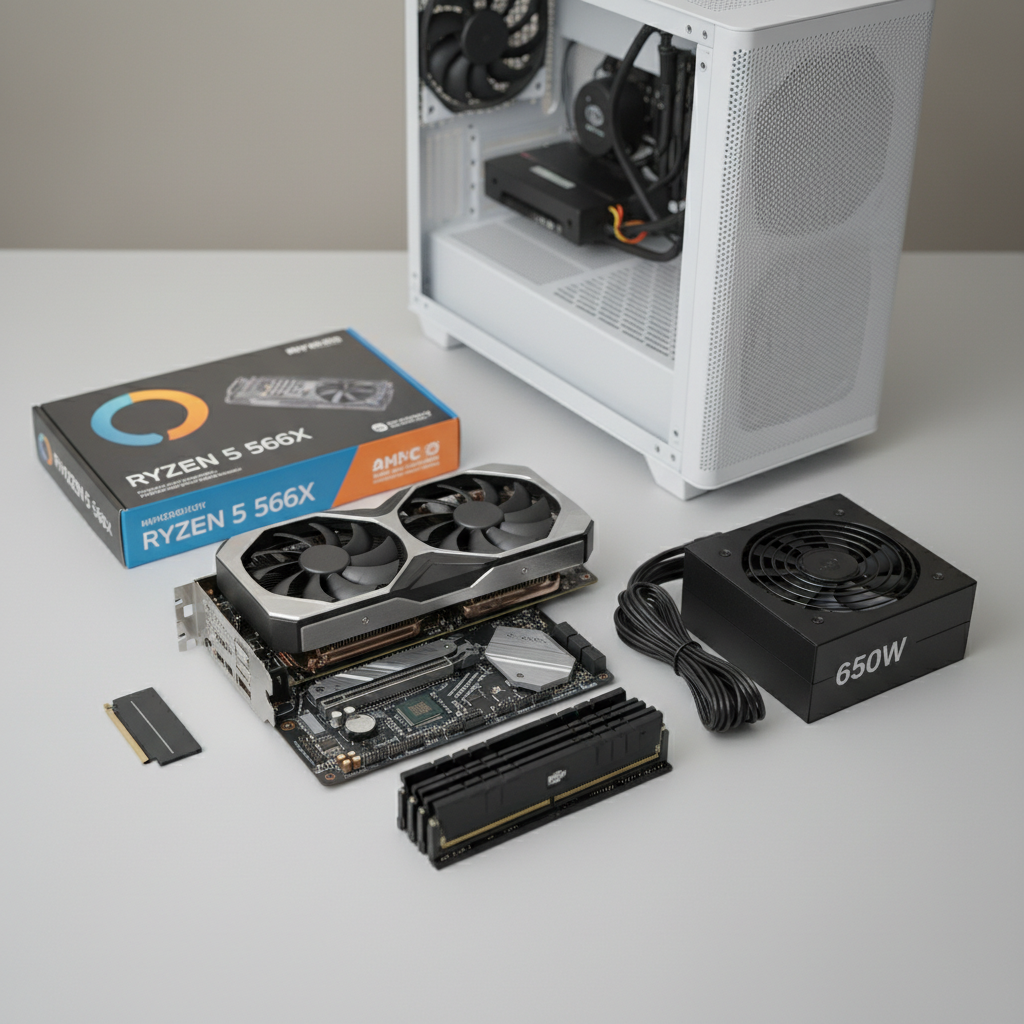
Choosing parts without creating bottlenecks
You don’t need a perfect “no bottleneck” build to be happy, but you do want a sensible pairing. Most under-$800 builds land in a midrange GPU with a budget-to-mid CPU, 16GB RAM, and a 1TB NVMe SSD.
GPU: the decision that shapes the whole build
For this budget, prioritize the best value GPU available that week in the $300–$380 zone. In the US market, that often means shopping current-gen value cards or last-gen deals, and being open to reputable used options if you’re comfortable testing.
- Look for: strong 1080p performance, 8GB+ VRAM, good cooling
- Avoid: paying extra for factory overclocks if it forces cuts elsewhere
- Used GPU tip: ask for original receipt if possible, and run a stress test early
CPU + motherboard: pick a platform you can live with
A common trap is overspending on the motherboard “just in case,” then buying a weaker GPU. Keep the board functional: enough M.2 slots, decent VRM reviews (power delivery quality), and the I/O you actually need.
- Good direction: modern 6-core or better CPU for smooth gameplay
- Motherboard must-haves: at least one M.2 slot, enough fan headers, BIOS support for the CPU
- Wi-Fi: if you need it, buying a board with Wi-Fi can be cheaper than adding a card later
RAM + storage: don’t overthink, but don’t cheap out
Most gamers should treat 16GB as the minimum. 32GB is nice if you multitask heavily, but it can push you over budget without changing in-game feel for many titles.
- RAM: 16GB (2x8GB) dual-channel kit
- Storage: 1TB NVMe SSD is the comfort pick for 2026 game sizes
Quick self-check: are you building the “right” $800 PC for your games?
Before you buy anything, answer these quickly. If any answer surprises you, adjust the build now, not after the return window closes.
- What do you play most? esports shooters, open-world AAA, modded games, or a mix?
- What monitor do you own? 1080p 144Hz needs different priorities than 1440p 60Hz.
- Do you need Wi‑Fi? if yes, plan it in the motherboard choice.
- Are you okay buying used? if not, your GPU tier may shift down slightly.
- Do you care about noise? then don’t pick the smallest case and the cheapest fans.
If your main goal is competitive FPS at high refresh, lean a bit more CPU-friendly (while still keeping a strong GPU). If you mostly play cinematic single-player games, keep the GPU budget heavy and don’t overspend on the CPU.
Step-by-step build process (the version that avoids common mistakes)
how to build a gaming pc under 800 gets much easier when you build in a clean order, test early, and keep cable management as “good enough” until you confirm it boots.
1) Prep and compatibility checks
- Confirm CPU socket matches motherboard.
- Confirm case fits motherboard size (ATX vs micro-ATX).
- Check GPU length vs case clearance.
- Check PSU wattage and PCIe power connectors match the GPU needs.
2) Build the “core” outside the case
This step feels optional, but it saves time. Install CPU, cooler, RAM, and SSD on the motherboard first. If your cooler uses a backplate, it’s much easier before the board goes into the case.

3) Install PSU and route essential cables first
Put the PSU in, then route the 24-pin motherboard cable and CPU EPS cable before the GPU blocks your hands. This is where small cases get annoying, so do it early.
4) Mount motherboard, then GPU
- Install motherboard standoffs correctly (missing standoff holes can cause flex).
- Seat the GPU fully until the latch clicks.
- Connect GPU power cables firmly, half-seated connectors cause random black screens.
5) First boot, then BIOS basics
On first boot, go to BIOS/UEFI and check CPU temps and that RAM shows up correctly. Enable your RAM’s XMP/EXPO profile so it runs at its rated speed. If you skip this, your “fine” build can feel oddly sluggish.
According to Microsoft..., official Windows installation guidance emphasizes using trusted installation media; for a new gaming build, create a clean USB installer from Microsoft’s tools rather than downloading random ISOs.
Performance tuning and cost-saving upgrades that actually make sense
Once the system runs, resist the urge to “optimize everything” in one night. Do a few high-impact tweaks, then play games.
- Update GPU drivers from AMD/NVIDIA/Intel official sites.
- Set fan curves for a quieter idle, then confirm load temps stay reasonable.
- Enable Resizable BAR if your platform supports it, it can help in some games.
- Undervolt (optional): can reduce heat/noise, but changes should be gradual; if unsure, stop and keep stock settings.
Smart “later” upgrades that typically feel real: add a second SSD when game installs pile up, move to 32GB RAM if you stream or keep heavy apps open, and upgrade GPU when pricing makes sense.
Mistakes that blow the budget (or cause headaches)
This is the stuff that makes people swear off building PCs, even when the parts are fine.
- Buying a no-name PSU: instability and shutdowns can look like “bad GPU” but aren’t.
- Forgetting airflow: a glass-front case with one fan can throttle parts in summer.
- Skipping the Windows plan: if you need Windows, budget for it or plan your license transfer early.
- Chasing ultra settings: optimized high settings often look nearly identical while running smoother.
- Ignoring return windows: test key parts immediately, especially if you buy used.
When to ask for help (and what to say so you get useful answers)
If the PC doesn’t post, repeatedly reboots, or shows artifacts on screen, it may be a simple seating issue or a dead part. If you’re not comfortable diagnosing hardware, a reputable local PC shop can often confirm the failure quickly, and that can save days of guessing.
When you ask online or in a shop, show: full parts list, PSU model, photos of motherboard power connections, and what debug LEDs/beeps indicate. That info turns vague advice into real troubleshooting steps.
Conclusion: an $800 gaming PC is about balance, not perfection
If you focus spending on the GPU, choose a sensible CPU platform, and keep the power supply and airflow respectable, you’ll end up with a machine that feels fast where it counts. The build process is mostly patience and order of operations, not magic.
If you want one clean next step: lock your GPU choice based on current pricing, then build the rest of the list around it using the budget table above, and buy from retailers with easy returns.
FAQ
What specs should I expect when learning how to build a gaming pc under 800?
In many cases, expect a midrange GPU, a 6-core class CPU, 16GB RAM, and a 1TB NVMe SSD. That combo tends to feel smooth in 1080p gaming, as long as the parts are balanced.
Is it better to buy a used GPU to stay under $800?
It can be, especially if new GPU prices spike. The trade-off is risk, so buy from a seller with a return option when possible, and stress-test the card early to confirm stability.
Do I need 32GB RAM for gaming at this budget?
Usually not for pure gaming, but it can help if you stream, mod heavily, or keep a lot of apps open. If 32GB forces a weaker GPU, most people regret the trade.
How much wattage do I need for an under-$800 gaming build?
Many builds land well with a quality 550W–650W unit, depending on the GPU and future upgrade plans. Check the GPU power connector requirements, not just wattage.
Can I build under $800 including Windows and a monitor?
It’s possible but tight. In that scenario, you often have to drop a GPU tier or hunt for used deals, and the experience depends a lot on local pricing and timing.
What’s the most common reason a new build won’t turn on?
Power connections not fully seated are extremely common, especially the CPU EPS cable and front-panel power switch pins. Reseating those carefully solves a surprising number of “dead” builds.
How do I avoid overspending on the motherboard?
Choose based on features you will use: Wi‑Fi need, M.2 slots, USB ports, and solid reviews for power delivery. Extra RGB headers and premium heatsinks rarely improve gaming performance.
If you’re trying to build this list with today’s US pricing and you want a more “no surprises” path, it often helps to start from one GPU you can actually find in stock, then I can help you sanity-check compatibility and where to spend a little extra versus where to trim without regret.